
Sketch-to-Render: How Hadaa’s AI Turns Hand-Drawn Plans into Photorealistic Gardens
Dennis Mutahi
Landscape Design Writer
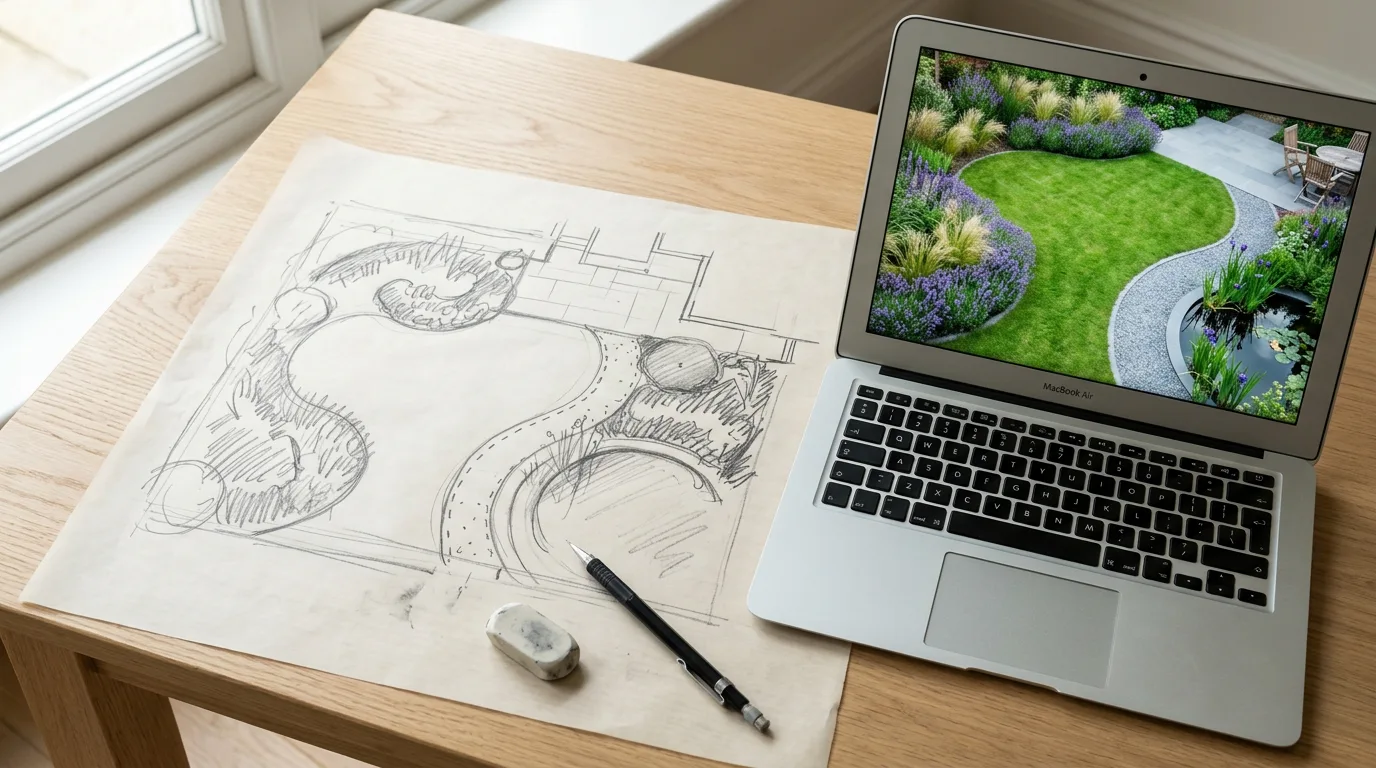
Upload any sketch — napkin drawing, iPad plan, or CAD plan image — and Hadaa’s Sketch Engine renders it into a photorealistic garden in seconds. The engine reads spatial intent from your lines, corrects perspective distortion, builds a depth model, renders, compares its output against your original drawing, refines, and upscales to 4K. This guide explains the full pipeline step by step — and why it replaces three days of SketchUp with a phone photo.
What Counts as a Sketch?
The Sketch Engine does not care about file quality or software. It reads spatial structure from lines — where a boundary is, where a path runs, where a planting zone sits. A shaky biro on a napkin carries enough spatial data to produce a photorealistic render, because the AI is interpreting design intent, not tracing pixels.
Three input types are supported. Each has slightly different preparation considerations, but all produce the same quality output.
Hand-Drawn Sketches
Pencil, biro, marker, or digital stylus — any medium that produces a visible line works. Take a photo in good light, upload the JPG, and the engine handles the rest. Perspective distortion from hand-held photography is corrected automatically in the error-detection pass before the first render begins.
CAD Plans & Architectural Drawings
Export your CAD drawing as a PNG or take a screenshot of a PDF plan. No proprietary file format is needed — the engine reads geometry from the image, not from the CAD file structure. mnml.ai requires a full SketchUp or Revit export before it will render anything; Hadaa works from any image you can produce from your drawing tool.
Site Photos & Drone Shots
Photograph your existing garden, bare plot, or construction site and Hadaa maps the real space, then renders the 3D landscape design directly onto it. This is particularly useful for projects where you have a site but not yet a drawing — the photo becomes the spatial input.
The Sketch Autopilot Pipeline, Step by Step
Sketch Autopilot is a fully agentic render pipeline — meaning an AI orchestrator chains together multiple specialised tools (Analyse, Inpaint, Compare, Upscale) without any manual steps between them. You provide two inputs: a sketch and a plain-text description. The engine handles everything from there across two phases, delivering four photorealistic 4K renders when it finishes.
Here is exactly what happens inside the pipeline from the moment you click upload.
Sketch Autopilot — full pipeline
Upload
You upload your sketch (hand-drawn, iPad, or CAD) and write a plain-text description in any language. Example: "Mediterranean courtyard with a fountain and terracotta paving, low-maintenance planting."
Classification
The engine confirms your file is a valid sketch input and classifies it — hand-drawn, architectural plan, or site photo. This determines how the spatial parser weights line confidence.
LLM interpretation
An LLM reads your text description and your sketch together, then generates two distinct, concrete design goals. Not style names — specific material, planting, and structural intentions. These become the seeds for Phase 1.
Error detection
Before rendering begins, the engine scans your sketch for perspective distortion, ambiguous zone boundaries, and scale inconsistencies. It corrects what it can and flags what it cannot resolve automatically.
Depth & site modelling
The engine builds a spatial model from your 2D input — inferring elevation, terrain gradient, boundary lines, and zone relationships. This is what produces a 3D landscape rather than a flat texture overlay.
Phase 1: Render × 2
The full agentic pipeline (Analyse → Inpaint → Compare → Refine → Upscale) runs on each of the two design goals in parallel. Two photorealistic 4K renders are delivered to your studio.
Phase 2: Variation goals
Without any input from you, the orchestrator generates two new variation goals — targeting different angles, seasonal views, or material palettes — and runs the full pipeline on both. Two more renders.
4K upscale
All four renders are upscaled to 4K with full detail preservation. Each is downloadable, shareable via link, and ready to hand to a contractor or client.
What Sketch Autopilot delivers
- 4 photorealistic 4K renders — 2 Phase 1 interpretations + 2 Phase 2 variations
- 0 manual steps between renders — the orchestrator dispatches all jobs
- 1 text description required — in any language, plain English or otherwise
Why This Replaces Three Days of SketchUp
SketchUp is extraordinary software. It can model any structure, any terrain, any material, at any scale. But it requires the user to build the 3D scene entirely from scratch — every wall, every path, every tree positioned manually. Before you render a landscape concept in SketchUp, you have already spent hours on geometry that has nothing to do with whether the design is good.
Sarah Jenkins, a landscape designer in Denver, put it plainly in her Hadaa review: “I used to spend three days in SketchUp just to get a concept ready for a new client. Now I do it in 15 minutes during the discovery call. My close rate on new consultations has nearly doubled.”
The difference is not processing power. It is the input model. SketchUp starts from nothing. The Sketch Engine starts from your drawing — which already contains your design intent — and builds the 3D model automatically from it.
Concept to photorealistic render
SketchUp workflow
- Draw site boundary (30 min)
- Model terrain and grade (1–2 hrs)
- Place structures, paths, beds (1–2 hrs)
- Import plant 3D models (30 min)
- Set up render (30 min)
- Export + post-process (30 min+)
- Total: 4–6 hours minimum
Sketch Autopilot workflow
- Photo your drawing or export CAD (2 min)
- Upload sketch + write description (3 min)
- Pipeline runs automatically (5 min)
- 4 photorealistic 4K renders delivered
- Total: 10 minutes
The key difference
SketchUp makes you build the scene. Sketch Autopilot reads the scene from your drawing and builds it for you. The 4–6 hours SketchUp costs is pure overhead before the design work begins. Marcus T., a landscape architect in Seattle, observed: “Professional landscape architecture software costs thousands a year and still doesn’t generate photorealistic renders this fast. I use Hadaa for client pitch decks and design iterations — it’s become essential to my workflow in a way no other AI landscaping tool has.”
Sketch Autopilot vs Manual Sketch Engine: When to Use Each
Both tools render sketches. The difference is control vs speed. Here is the decision guide.
Rule of thumb: If you want results fast and are happy to explore multiple directions, use Sketch Autopilot. If you know exactly what you want and need to control each render step, use the manual Sketch Engine in Pro Studio.
Who Uses the Sketch Engine
Four distinct audiences use the Sketch Engine regularly. The pipeline was designed to serve all of them from the same upload.
Homeowners with iPad Sketches
The most common use case: a homeowner who has drawn a rough plan on paper or their iPad and wants to see it photorealistic before spending anything on a professional designer or contractor. Sketch Autopilot at $9 per run delivers four renders — two interpretations and two variations — giving a clear picture of how the drawing translates to real space. No prior design experience needed.
DIY Landscapers with Paper Plans
Kevin H., a DIY landscaper, had this to say after using the Sketch Engine: “I had a hand-drawn layout sketch of my backyard and wanted to see it brought to life. The Sketch Engine converted it into a photorealistic landscape design in under two minutes. No other tool I tried could do that — they all just ignored my sketch entirely.”
For self-builders planning a multi-weekend project, seeing the render before breaking ground is the difference between committing confidently and revising mid-project. The render also serves as a clear brief for materials suppliers and local contractors.
Landscape Designers Rendering During Consultations
The professional workflow Sarah Jenkins describes is increasingly standard: arrive at a client site visit with a concept sketch, photograph it, upload to Hadaa Pro Studio, and present a photorealistic render before leaving. The time saved on post-visit visualization frees up hours that previously went to SketchUp and reduces the back-and-forth revision cycle that consumes most of a design project’s margin. Pro Studio includes commercial licensing, 4K export, and white-label client-branded PDF exports — $39 a month.
Architects & CAD Users Wanting Instant Renders
Architects producing landscape concept drawings alongside building designs use the Sketch Engine as a rapid visualization tool for early client sign-off. Export your CAD plan as a PNG, upload it, and get a photorealistic exterior render in the time it would take to set up a rendering scene from scratch. ArchiVinci is locked to professional architects using Revit and AutoCAD — Hadaa serves the same output from a screenshot of any format.
“I had a hand-drawn layout sketch of my backyard and wanted to see it brought to life. The Sketch Engine converted it into a photorealistic landscape design in under two minutes. No other tool I tried could do that — they all just ignored my sketch entirely.”
Kevin H.
DIY Landscaper · AI Sketch to Landscape Design · Used Sketch Engine
8 Tips for Better Sketch Engine Results
The engine produces good results from almost any input. These techniques consistently push results from good to exceptional.
Photograph in flat, diffuse light
Harsh shadows from a single light source create false depth cues the engine reads as terrain. Take your photo near a north-facing window, outdoors on an overcast day, or use a lightbox for small sketches. Flat even light lets the engine read your lines, not the shadows.
Label zones clearly on the drawing
Write annotations directly on your sketch: "lawn", "gravel path", "raised bed", "patio". The engine reads text alongside spatial structure. A labeled sketch produces renders that reflect your zones more accurately than an unlabeled one, even if the drawing itself is rougher.
Be specific in your text description
"Mediterranean garden" produces a generic result. "Mediterranean courtyard: terracotta paving, olive tree centered on left bed, lavender border along south fence, stone fountain at the far end" produces a render that reflects your actual design intent. Spatial references (left, right, far end, center) are particularly effective.
Export CAD at 300 dpi minimum
When exporting from AutoCAD or similar software, use 300 dpi or higher. Low-resolution exports lose fine line detail that the engine uses to distinguish structure lines from planting zone boundaries. A 1200px-wide image is the practical minimum for reliable geometry reading.
Use heavier line weight for structural elements
If drawing by hand: use a heavier pen or darker line for walls, boundaries, and paths, and a lighter touch for planting zones. The engine weights thicker lines as structural boundaries and thinner lines as soft zones. This matches standard architectural drawing convention and produces more accurate renders.
Write two contrasting descriptions to drive Phase 2 variations
Sketch Autopilot’s Phase 2 generates automatic variations from your original description. You can influence the variation direction by including a secondary intent in your text: "primary: gravel and ornamental grass, variation direction: more structured with clipped hedges and formal symmetry". The LLM uses this to generate more diverse Phase 2 outputs.
Include a scale reference on the drawing
Add a simple scale bar or a note like "boundary wall = 12 metres" on your sketch. The engine uses scale information to calibrate plant sizing and path widths in the render. Without it, the engine infers scale from typical domestic garden proportions, which is usually adequate but not always accurate for unusually large or small plots.
Keep your phone camera perpendicular to the paper
When photographing a flat paper sketch, hold your camera directly above the drawing with the phone parallel to the paper surface. Angled shots create keystone distortion that takes the error-detection pass extra cycles to correct. A perpendicular shot produces cleaner geometry input from the start.
Frequently Asked Questions
What file formats does the Sketch Engine accept?
Can the Sketch Engine read a photo of a hand-drawn sketch?
How is Sketch Autopilot different from the manual Sketch Engine?
Do I need design skills to use the Sketch Engine?
Can landscape designers use the Sketch Engine for client work?
Sketch Engine & Sketch Autopilot
Your sketch is already a design.
Let’s render it.
Upload any sketch — hand-drawn, iPad, or CAD — add a text description, and Sketch Autopilot delivers four photorealistic 4K renders automatically. No 3D modelling. No SketchUp. No design experience required.


