
Backyard Outdoor Kitchen Ideas: 40+ Designs, Layouts & Cost Breakdown
Dennis Mutahi
Landscape Design Writer
An outdoor kitchen transforms your backyard from a view to live with into a space to actively use. But size, layout, and appliance choices matter far more than any single grill. We’ve designed hundreds of outdoor kitchens across different yard sizes, budgets, and entertaining styles. In this guide, we’ll walk through layout types, essential and optional appliances, real cost breakdowns, and how to visualize your kitchen before a single brick is laid.
Quick Answer
- Basic outdoor kitchen: grill + counter + cabinetry = $15,000–$25,000.
- Add utilities: gas line ($2,500), sewer ($3,500), electrical ($2,000) = minimum $8,000 more.
- Full-featured kitchen: grill, sink, fridge, pizza oven, multiple burners, shelter = $40,000–$60,000+.
- Layout matters most: an island kitchen works in large yards; galley kitchens save space in small yards.
- Visualize first: use AI landscape design tools to render 40+ kitchen layouts in your actual yard before deciding.
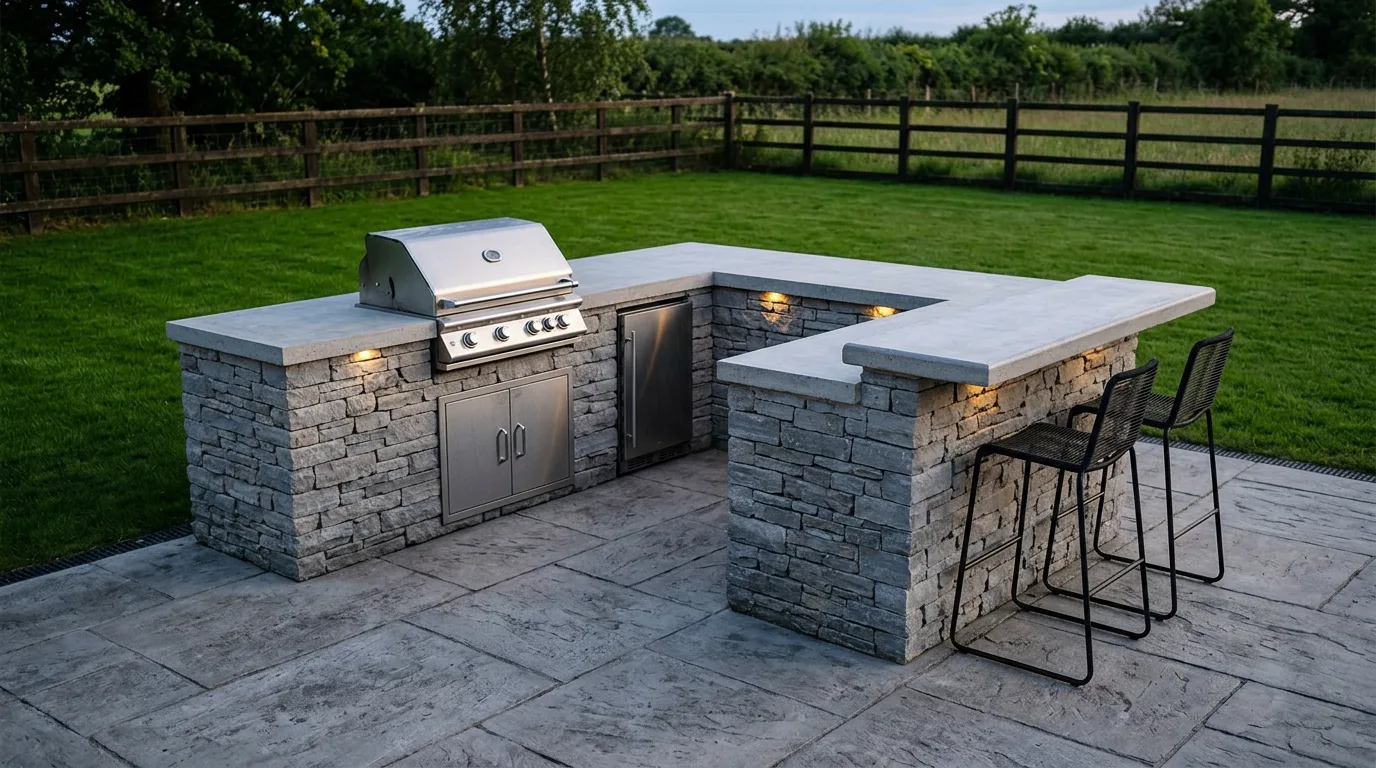
Kitchen Types & Layouts
Outdoor kitchen layout is not one-size-fits-all. The right configuration depends on your yard size, entertaining style, and how much space you want to dedicate to cooking versus lounging.
Linear (Galley) Kitchen
The galley or linear kitchen runs along one side of the patio, typically against a fence, deck edge, or the house itself. It occupies minimal yard real estate while keeping the cooking zone clearly defined.
Best for: Small yards where you want to preserve open space for guests to gather and move around. Also works well when you want cooking to feel somewhat separate from entertaining.
Layout essentials: grill on one end, counter space in the middle, sink if plumbing allows, cabinetry and storage on the other end. Simple, efficient workflow.
Best When
Your yard is narrow or your entertaining focus is social gathering, not cooking. The kitchen is functional but doesn't dominate the space.
Island Kitchen
An island kitchen sits in the center of the patio, accessible from all sides. The cook remains part of the social action, and guests can gather around to watch and chat. This layout demands more space and plumbing/utility work, but creates the most engaging entertaining experience.
Best for: Entertaining-focused households with medium to large yards. The cook is the center of attention, which some homeowners love and others find uncomfortable.
Common configuration: A long island with grill on one end, counter space in the middle, sink and storage on the other. Bar seating on the side furthest from the house creates a natural gathering spot.
Best When
You have the yard space, you love to cook, and you want guests interacting with you while you work the grill. You're willing to invest in utilities running to the island center.
L-Shaped Kitchen
The L-shaped kitchen takes up two perpendicular edges of the patio, typically a corner. It offers more counter and storage space than a linear kitchen while using less yard real estate than an island. The two-zone layout naturally separates prep work (one leg) from cooking/grilling (the other leg).
Best for: Households that want functional cooking space without sacrificing too much entertaining area. Good compromise between linear efficiency and island flexibility.
Typical setup: One leg holds the grill and cooking surfaces; the other leg has sink, prep counter, and refrigeration.
Best When
You have a corner patio, want efficient workflow, and need both cooking and prep zones without dominating the entire yard.
Modular & Cart-Based Kitchens
A portable grill cart paired with a rolling countertop lets you set up a functional outdoor cooking space without construction. Perfect for renters, small yards, or anyone testing whether outdoor cooking is a priority before investing $30,000+.
Popular options: Weber Genesis grill + Pottery Barn rolling cart, or prefab compact kitchens from outdoor brands like RTA Outdoor Living.
Best When
You're renting, have a tiny yard, or you're uncertain whether you'll actually use an outdoor kitchen enough to justify the investment. Easy to upgrade later if you decide you love outdoor cooking.
Outdoor Kitchen Plans: The Dimensions That Decide the Layout
A layout is a shape; a plan is a shape with numbers on it. Three sets of numbers decide whether an outdoor kitchen works once it is built — the counter dimensions, the clear space people stand in, and the separation the fire code and the grill manufacturer require. Get the first two wrong and the kitchen is awkward forever, because it is concrete and stone rather than furniture.
Counter and bar dimensions
| Element | Dimension | Why |
|---|---|---|
| Counter height | 36" | Standard work height; matches indoor base cabinets |
| Bar height | 42–46" | Raised bar top, screens the cooking surface from seated guests |
| Table height | 30" | If you seat people at the island rather than at a bar |
| Barstool height | 28" | Pairs with a 42–46" bar top |
| Between each amenity | 16" minimum | Somewhere to put the thing you just picked up |
| Working counter, if you cater | 3–4 ft | Prep for a crowd needs a run, not a gap |
Dimensions as published by Landscaping Network, crediting Kalamazoo Outdoor Gourmet's design recommendations and designer Scott Cohen.
Landing space is the number people skip
Every published guideline says the same thing in different words: a grill and a sink both need a landing area on each side. A grill with counter on one side only is the single most common fault in a finished outdoor kitchen, because the hot thing you lift off it has nowhere to go. With at least 16" between amenities as the floor, a grill flanked by two work surfaces sets the minimum length of a run: grill width plus roughly 2–4 feet. That is why a galley that looks generous on paper at 6 feet turns out to hold a grill and nothing else.
The second number is the aisle. The cook needs to open the grill hood, turn, and set something down without anyone stepping around them — so treat the clear space in front of the run as circulation, not patio, and keep it continuous with the way people arrive. An island plan buys that aisle on four sides and spends roughly twice the paved area doing it, which is the real trade between an island and an L.
The clearance rule, and what it actually applies to
The 2021 International Fire Code, section 308.1.4 states that "Charcoal burners and other open-flame cooking devices shall not be operated on combustible balconies or within 10 feet (3048 mm) of combustible construction." Combustible construction means wood or wood-composite decks, railings and siding — and, per the code commentary, the 10-foot separation "applies to each side as well as what is above the grill."
Then read the exceptions, because most blogs quote the rule and stop. The code lists three: one- and two-family dwellings; buildings, balconies and decks protected by an automatic sprinkler system; and LP-gas devices with a container no larger than 2.5 lb water capacity (nominal 1 lb of gas). The first one is the one that matters here — a detached house or a townhome is normally exempt, which is why built-in grills sit against houses all over the country without breaking any code.
Exempt is not the same as safe, and it is not the same as permitted. The NFPA's own guidance is that a grill "should be placed well away from the home, deck railings and out from under eaves and overhanging branches", and to keep children and pets at least three feet from the grill area. Your HOA can also prohibit what the code allows. And a built-in grill carries its own manufacturer clearance to combustibles for the specific model — that figure, not a generic one, is what a building inspector will ask for, so pull the installation manual before the island is poured rather than after.
Sketching your own plan
Work in this order and the plan mostly draws itself:
- Mark the fixed points first. Where gas, water and power can reach, where the door to the indoor kitchen is, and where the prevailing wind carries smoke.
- Place the grill, then its two landing areas. Everything else arranges around that trio.
- Draw the aisle as a solid block and refuse to let the plan eat it. It is the first thing lost and the only one you cannot add later.
- Check the clearance to anything combustible — siding, railings, a pergola above — against the grill's own manual, not a rule of thumb.
- Only then choose the shape. Galley, L, U or island is an outcome of the first four steps, not a starting decision.
Essential Appliances & Components
Start here. These are the items that make a space function as a kitchen, not just a grill.
Grill
Gas grill: The most popular choice. Faster preheat, precise temperature control, less cleanup. Requires a gas line ($2,500+ to install if not existing). Built-in gas grills run $2,000–$8,000; portable propane tanks work but require refilling.
Charcoal grill: Traditional flavor, no gas line needed, cheaper upfront ($500–$2,000). Slower to preheat, harder to control temperature. Better for entertaining-focused cooks than weeknight dinners.
Electric/hybrid: Rare in outdoor kitchens, but low-smoke options exist for HOA-restricted communities.
Counter Space
You need somewhere to set down a plate, cutting board, or drink. A minimum of 3 feet per side of the grill is functional; 6–8 feet gives you room to actually work. Stone (granite, slate) is durable but expensive. Concrete is affordable and accepts any finish. Avoid wood or cheap materials that stain and crack outdoors.
Sink
Highly recommended. Saves trips indoors to wash hands, prep food, and rinse dishes. Stainless steel is the standard. Installation cost is usually the water/sewer connection ($3,500–$7,000), not the sink itself ($500–$2,000). In cold climates, a frost-free outdoor faucet is essential or you risk burst pipes.
Storage & Cabinetry
Store grilling tools, propane spares, and linens. Stainless steel cabinets, teak wood, or marine-grade composites are common. Avoid untreated wood or standard indoor cabinetry — they rot outdoors. 2–3 cabinet units are usually enough for average entertaining.
Complete Cost Breakdown
| Kitchen Type | Base Cost | + Utilities | + Shelter | Total |
|---|---|---|---|---|
| Modular/Cart | $3,000–$5,000 | N/A | N/A | $3,000–$5,000 |
| Basic Built-In Grill | $8,000–$12,000 | $2,500–$5,000 | N/A | $10,500–$17,000 |
| Grill + Sink + Storage | $15,000–$20,000 | $5,000–$8,000 | $2,000–$5,000 | $22,000–$33,000 |
| Island Kitchen | $25,000–$35,000 | $8,000–$12,000 | $5,000–$15,000 | $38,000–$62,000 |
| Full-Featured Kitchen | $35,000–$50,000 | $8,000–$12,000 | $5,000–$20,000 | $48,000–$82,000 |
Where Your Money Goes
- Appliances (grill, fridge, cooktop): 30–40% of budget
- Cabinetry & countertops: 25–35%
- Materials (stone, tile, pavers): 15–20%
- Utility installation (gas, water, electrical): 10–20%
- Shelter/pergola/roof structure: 10–30% if included
- Labor & installation: Varies widely by region
Pro Tip: Design Before You Build
Use AI landscape design to visualize 40+ kitchen layouts, material options, and placement variations before spending a penny on construction. Generate renders of your exact yard with different kitchens — island, galley, L-shaped — and see which fits best. Catches problems early and prevents costly design changes mid-project.
Materials & Finishes
Countertops
-
Granite/Slate
Durable, beautiful, expensive ($100–$300/sq ft). Excellent for outdoor kitchens. Can be slippery when wet.
-
Concrete
Affordable ($50–$150/sq ft), flexible finishes, can crack over time. Seal regularly.
-
Marble
Elegant but soft and stains easily. Not recommended for outdoor kitchens unless well-protected.
-
Stainless Steel
Practical, matches appliances, shows fingerprints, can get hot to the touch.
-
Quartz/Engineered
Durable, non-porous, consistent look. More affordable than natural stone. Resists staining.
Cabinetry
-
Stainless Steel
Industry standard. Won't rust, easy to clean, can fingerprint. Matches appliances.
-
Teak
Premium wood, naturally weather-resistant. Expensive ($150–$400/linear foot) but beautiful. Requires annual oiling.
-
Marine-Grade Plywood
Treated wood that resists rot. More affordable than teak. Needs paint/stain maintenance.
-
Composite/Aluminum Frame
Modern, durable, low-maintenance. Mid-range pricing.
Flooring Around the Kitchen
-
Pavers (porcelain/natural stone)
Slip-resistant, durable. Good for outdoor kitchens. $15–$50 per sq ft installed.
-
Composite decking
Modern, low-maintenance. Can feel plastic-like. $10–$25 per sq ft.
-
Gravel/aggregate
Affordable, permeable. Less formal but works for casual kitchens. $2–$5 per sq ft.
-
Sealed concrete
Practical, affordable. Can be slippery when wet — add anti-slip coating.
How to Design Your Outdoor Kitchen
1. Assess Your Yard & Utilities
Photograph your patio or intended kitchen area from multiple angles. Check where existing utilities run — gas, water, electrical lines. If you need to extend utilities, identify the routes and approximate distances. This determines feasibility and cost.
2. Identify Your Entertaining Style
Do you throw large parties or cook for small gatherings? Do you want to be included in conversation while cooking, or separate from guests? Do you cook seriously or is the grill mostly decorative? This shapes layout choice (island vs. galley).
3. Prioritize Essentials vs. Wants
What absolutely must your kitchen have? Grill — yes. Sink — probably. Pizza oven — nice to have. Fridge — depends. Work backwards from budget and list what you'll actually use.
4. Visualize Multiple Layouts
Don't commit to one design. Use AI landscape design tools to render 40+ different kitchen layouts in your actual yard. See galley, island, and L-shaped options with different finishes. Garden Autopilot delivers 22 renders, a planting guide, and a contractor blueprint for $9 — lets you see how the kitchen integrates with the whole backyard before calling a contractor.
5. Plan Utilities Carefully
Work with licensed professionals for gas, water, and electrical. Improper utility installation creates safety risks and fails inspections. Budget $8,000–$15,000 for utility runs if not already in place.
6. Get Contractor Quotes
Once you have a finalized design, get 3+ quotes from local contractors. Share your visualization and specs so quotes are apples-to-apples.
Small Backyard Outdoor Kitchen Ideas
A tight yard is not a barrier to a real outdoor kitchen — it just changes the priorities. Under 300 sq ft, every inch of counter and every foot of walkway has to earn its place. The goal is a cooking zone that feels intentional, not cramped, while leaving room to actually gather.
-
Build against a wall or fence
A single-run galley kitchen along one existing edge frees the center of the yard for a table or lounge. It also lets you share a wall for gas and electrical runs, cutting utility costs. See the Linear (Galley) layout above for the full breakdown.
-
Go vertical for storage
When floor space is scarce, move storage up. Wall-mounted cabinets, hanging rails for tools, and a slim spice shelf keep the counter clear without widening the footprint.
-
Choose a compact or drop-in grill
A 28–32 inch built-in grill covers most family cooking. Pair it with 3–4 linear feet of counter — enough to plate and prep without dominating the patio.
-
Use a modular cart to stay flexible
For renters or the truly tight yard, a rolling grill cart plus a folding side counter gives you a working kitchen you can wheel out of the way. It's also the cheapest entry point at $2,000–$10,000.
-
Let the surroundings do double duty
A bench that doubles as storage, or a bar-height counter along the kitchen edge that serves as both prep space and seating, keeps a small yard from feeling divided.
Plan the whole yard, not just the kitchen
In a small yard the kitchen shares space with everything else, so plan them together. Our backyard patio ideas guide covers layouts that keep a compact cooking zone and a seating area feeling like one connected space rather than two crowded ones.
Real Outdoor Kitchen Examples
Small Urban Patio Kitchen
Linear galley-style kitchen with modular cart components. Grill, small counter space, storage. Fits a 12×15 ft patio. Cost: $12,000. Best for: apartment dwellers, renters, small spaces.
Suburban Family Island Kitchen
Island kitchen with grill, sink, refrigerator, and wraparound bar seating. Covers 600 sq ft of the backyard. Cost: $45,000 including utilities and pergola cover. Best for: entertaining families, serious outdoor cooks.
Mediterranean L-Shaped Kitchen
L-shaped stone kitchen with pizza oven, grill, and sink. Mediterranean finishes blend into desert landscaping. Cost: $55,000. Best for: warm climates, pizza-focused entertaining, architectural statement pieces.
Modern Minimalist Galley
Clean-lined galley with stainless steel appliances and concrete counters. Tight but functional. Cost: $28,000. Best for: contemporary homes, small entertaining groups, budget-conscious high design.
Frequently Asked Questions
What is the best outdoor kitchen layout for a small backyard?
How much does a built-in outdoor kitchen cost?
Do I need utilities run to an outdoor kitchen?
What materials are best for outdoor kitchen countertops?
Should an outdoor kitchen be covered?
What's the difference between an island and a galley outdoor kitchen?
Can I design an outdoor kitchen using AI landscape design?
What appliances do I actually need in an outdoor kitchen?
How long does it take to build an outdoor kitchen?
Does an outdoor kitchen add value to your home?
Design before you build
Visualize 40+ outdoor kitchen layouts
in your actual yard.
Upload a photo of your backyard and Garden Autopilot generates 22 photorealistic renders showing island, galley, and L-shaped kitchens with different finishes, materials, and placements. See what works before spending $30,000+. Plus: planting guide, contractor blueprint, and bill of quantities.


