
Backyard Steps & Garden Stairs: Materials, Dimensions & Design Ideas
Francis Karuri
Landscape & AI Correspondent
Garden stairs are one of the most technical hardscape elements and one of the most neglected in design guides. Get the riser-to-tread ratio wrong and a flight of steps feels exhausting or dangerously steep. Get the material choice wrong and you're relaying the whole thing in five years. This guide covers the dimensions that matter, which of three different standards your flight actually answers to, the materials worth the money, and the design details that turn a functional staircase into a genuine landscape feature. If the slope itself is still an open question, start with landscaping on a slope and what retaining walls cost, then come back here for the flight.
Quick Answer
- Height difference between steps: none. Every riser in a flight is the same height, and the residential code allows the tallest to exceed the shortest by no more than 3/8 inch across the whole flight.
- Comfortable riser height: 5.5–6.5 inches. The residential ceiling is 7.75 in.; on an accessible route the ADA ceiling is 7 in. and the floor is 4 in.
- Comfortable tread depth: 12–17 inches (deeper = more leisurely). Residential minimum 10 in.; ADA minimum 11 in.
- Formula: 2 × riser + tread ≈ 26 inches — a design rule of thumb, not a code requirement
- Minimum width: 36 in. functional, 48 in. recommended, 72 in. for statement stairs
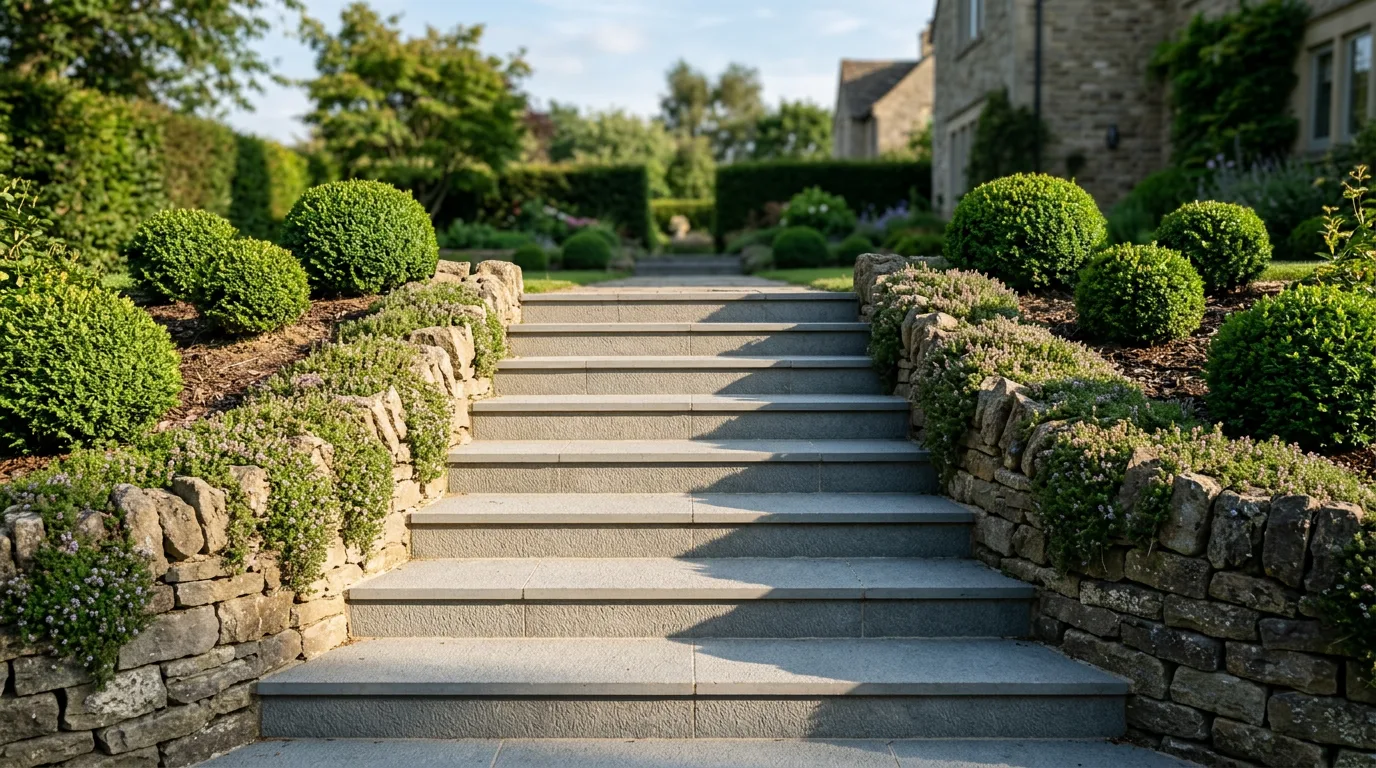
The Dimensions That Make or Break Garden Stairs
Stair ergonomics are well-established. The formula 2R + T = 26 inches (where R = riser height and T = tread depth) produces a comfortable stride for most adults on exterior stairs. Deviate significantly from this range and users notice — either exhaustion climbing steep risers or awkward shuffling on excessively shallow ones.
| Stair Type | Riser | Tread | Best Use |
|---|---|---|---|
| Leisurely / feature | 4–5 in. | 16–17 in. | Terraced gardens, entrance stairs |
| Standard garden | 6–6.5 in. | 13–14 in. | Most backyard applications |
| Steeper / space-saving | 7–7.75 in. | 10.5–12 in. | Tight slopes, utility access |
Width Recommendations
- 36 inches — the residential code minimum for a stairway serving the house (IRC R311.7.1). A flight of steps purely within the garden, on no route in or out of the building, is usually outside that requirement — but 36 in. is still the narrowest width that works for one person carrying something
- 48–60 inches — comfortable for two people; appropriate for main garden routes
- 72 inches+ — statement stairs; creates a true architectural feature and frames the garden view
Key rule
All risers in a flight must be the same height, and 3/8 inch is the number to remember — but as a limit, not as a hazard. The residential code sets it as the maximum permitted variation: “The greatest riser height within any flight of stairs shall not exceed the smallest by more than 3/8”,” and the same 3/8 inch applies to tread depth (City of Saint Paul, Stairways and Handrails for Residential Structures, citing IRC R311.7.5). Build to zero variation and you have 3/8 inch of margin for a settled tread; build to 3/8 inch and you have none. Set a string line from top to bottom before the first tread goes in.
Three standards, three different answers
Almost every garden-steps guide prints one set of numbers. There are three, they disagree, and which one binds your flight depends on what the steps are for rather than on what they are made of. A run of steps on the route between the driveway and the front door is a stairway serving the dwelling. The same steps dropping from a lawn to a fire-pit terrace, on no route in or out of the house, usually are not. And a flight on a route that has to be accessible — a shared path, a commercial garden, a home being adapted for someone who will use it with a cane — answers to the ADA, whose riser ceiling is three quarters of an inch lower than the residential one.
| Requirement | Residential code (IRC) | ADA accessible route | Landscape rule of thumb |
|---|---|---|---|
| Riser height | 7 3/4 in. maximum, no minimum | 4 in. minimum to 7 in. maximum | 5.5–6.5 in. |
| Tread depth | 10 in. minimum | 11 in. minimum | 12–17 in. |
| Variation within a flight | 3/8 in. maximum, risers and treads alike | Uniform | Build to zero |
| Handrail | One side, on any flight with 4 or more risers; 34–38 in. above the nosings | Both sides, continuous, including a single-riser step; 34–38 in. | — |
| Guard at an open edge | Total rise more than 30 in. above the grade below: 34 in. minimum on the open side of the stairs | Per the governing building code | — |
| Graspable section | Circular, 1 1/4 in. to 2 in. across | Circular, 1 1/4 in. to 2 in. across | — |
Residential figures: City of Saint Paul Department of Safety & Inspections, “Stairways and Handrails for Residential Structures” (IRC R311.7, R312). Accessible-route figures: U.S. Access Board, ADA Standards Guide, Chapter 5: Stairways (§504.2, §504.3, §505.4). Your own jurisdiction adopts its own edition and may amend it — confirm the two numbers that matter (riser ceiling, guard trigger) with your building department before you order stone.
The trap in the middle of that table
The handrail trigger and the guard trigger are two different requirements that catch two different flights, and conflating them is the most common way a finished set of garden steps fails an inspection.
- Handrail — counted in risers. Four or more risers and you need one, however shallow the drop.
- Guard — measured in inches. More than 30 in. of total rise above the grade below and an open side needs a 34 in. guard, however few the risers.
So a three-riser flight at 11 in. a riser needs no handrail and does need a guard — 33 in. of rise on three steps. A six-riser flight at 4 in. a riser needs a handrail and no guard. Neither case is the one most guides describe.
Garden Stair Materials: Durability, Look & Cost
Material choice determines longevity, maintenance load, and aesthetic category. The cheapest material that looks good at year one is often the most expensive by year ten. These are the honest tradeoffs.
Natural Stone
Bluestone, limestone, and sandstone are the gold standard for formal garden stairs. Sawn-finish stone provides natural grip without being rough underfoot. Cleft-finish stone is the most textured and best for wet climates.
Best for: Formal gardens, terraced hillsides, entrance staircases, anywhere longevity is the priority.
Verdict
The premium choice with the lowest total lifetime cost. Justify the upfront price against the fact that you will never replace these steps.
Precast Concrete Pavers
The best value for contemporary and transitional garden styles. Manufactured to consistent dimensions, easy for contractors to price, and available in a range of textures from smooth to exposed aggregate. Textured finishes are essential — smooth concrete becomes a hazard when wet.
Verdict
The pragmatic choice for mid-range budgets. Match the paver texture and colour to your patio for a cohesive hardscape language.
Timber Sleepers
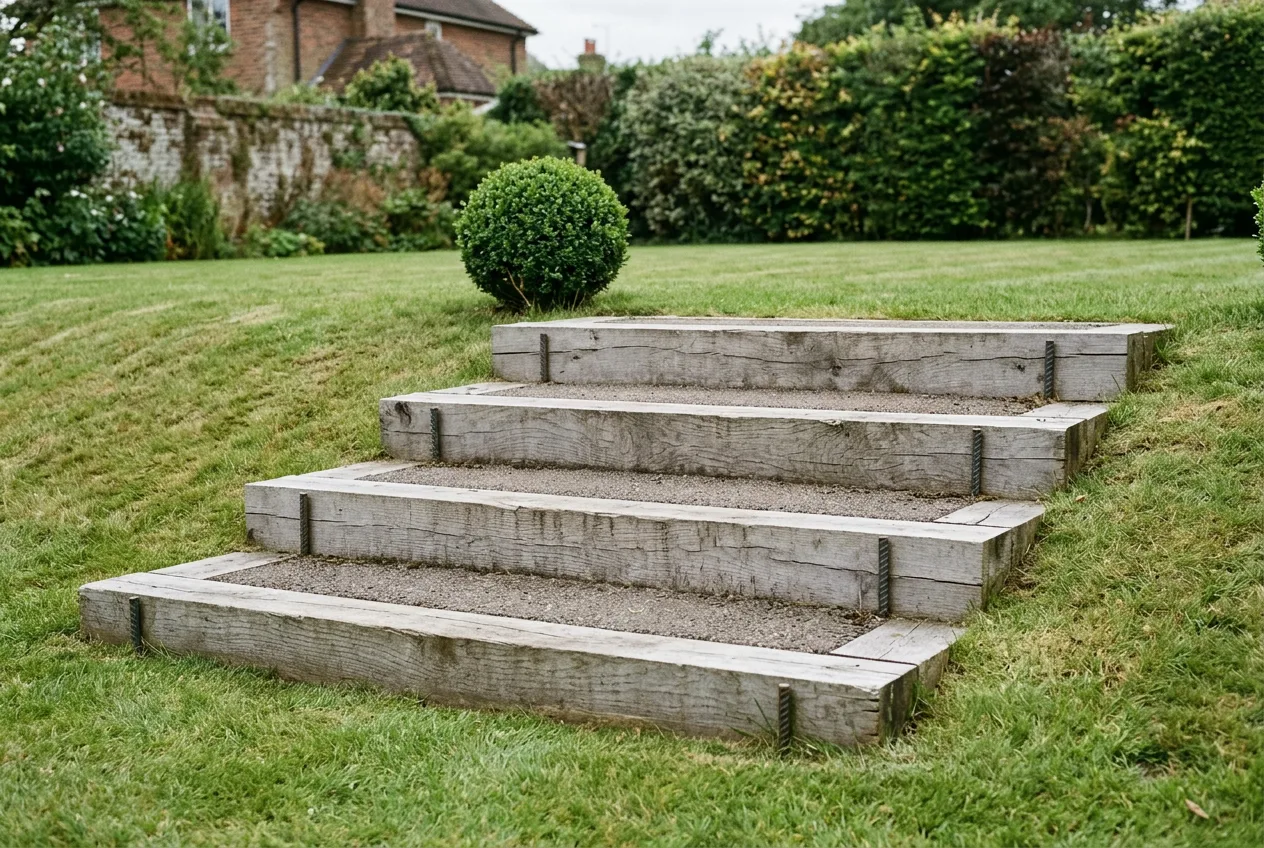
Hardwood sleepers (oak, treated pine) suit informal, cottage, and woodland garden styles. The lowest installation cost but highest maintenance — require annual treatment and replacement in 10–15 years. Composite sleepers (Millboard, Trex) extend the lifespan to 25+ years with minimal maintenance.
Verdict
Specify composite over hardwood unless the informal look of weathered timber is intentional. Real wood stairs at this price point are often a ten-year asset, not a permanent installation.
Gabion & Boulder Steps
Gabion basket risers filled with stone, with large flat boulders or sawn stone as treads. Creates dramatic stair landings that double as retaining structure. Well-suited to contemporary, naturalistic, and industrial garden styles. Drainage is excellent — water passes through the gabion fill rather than pooling. Requires engineering input on steep slopes. For the cage specification, fill stone and the drainage detail behind a gabion structure, see gabion wall ideas.
Verdict
A design statement that earns its premium price. Most effective on slopes where the stairs are the primary visual focal point of the garden.
Design Styles: From Utility to Statement
The same slope and the same budget can produce stairs that read as pure infrastructure or as the most distinctive element in the garden. The difference is intention — integrating the stair design into the surrounding landscape rather than treating it as a separate structure.
Integrated Planting Steps
Plant between risers and along edges — creeping thyme, sedum, or ajuga on the risers; ornamental grasses or lavender framing the sides. Keep treads clear for safety. This approach blurs the boundary between structure and garden and makes stairs feel grown rather than built.
Wide Landing Steps
Double the tread depth every three or four risers to create a landing that functions as a mini-terrace. Place a pot, a bench, or a low planting bed on the landing to invite pause. These landings also break the visual monotony of a long staircase on a steep slope.
Floating Steps
Cantilevered or widely-spaced stepping stones give a light, modern feel. Work best with minimal planting rather than dense borders — the negative space between steps is part of the composition. Require very stable sub-base since individual treads can't support each other.
Curved Staircases
A gentle curve in a garden stair changes the entire experience from functional to ceremonial. Natural stone or loose pavers handle curves more easily than precast concrete. Even a 10° curve in plan softens the formality of a straight flight and improves the relationship to organic planting beds on either side.
Foundations: The Part Most DIY Guides Skip
Garden stairs fail at the foundation almost every time. Treads shift, settle, heave — then become a trip hazard. A well-specified sub-base costs 20% more than a shortcut and is the reason professional stairs are still plumb a decade later.
Sub-base specification by stair type
Masonry / stone stairs
Minimum 6 inches compacted MOT Type 1 aggregate + 3 inches concrete haunching beneath the first riser. Each tread set in mortar on a concrete base. The base for the bottom riser must sit on undisturbed or compacted fill — never on topsoil.
Timber sleeper stairs
6 inches compacted gravel per tread position + 2×2 treated timber deadman anchors driven 18 inches into the slope behind each sleeper. Galvanised rebar spikes through sleeper into gravel. Geotextile fabric beneath gravel prevents clay migration.
Stepping stone paths on gentle slopes
4 inches compacted grit sand per stone. Each stone must sit stable under full body weight before backfilling. Test by standing on each stone and checking for wobble before moving to the next.
Safety & Drainage: The Details That Prevent Failure
Build in drainage from the start
Each tread needs a 1% cross-fall (1 inch per 8 feet) so water runs off rather than pooling. On longer flights, consider a channel drain at the base of the stairs to intercept water before it migrates under the foundation. Ignored drainage is the cause of most stair settlement.
Texture matters more than material
Polished or honed stone surfaces become dangerously slippery outdoors. Specify brushed, sawn, or flame-textured finishes for any stone tread. For concrete, a broom finish is the minimum — exposed aggregate is better. Anti-slip strips on composite or timber treads are an inexpensive safety upgrade.
Lighting transforms night safety
Low-level step lighting (recessed into the riser or mounted on a planting wall beside the step) eliminates shadow on treads at night without creating glare. Run conduit during construction — retrofitting lighting into finished masonry is an expensive disruption. Solar step lights are a workable alternative on shallow flights.
Related reading
See Your Garden Stairs Before You Build Them
Getting stair design right the first time means making decisions about material, width, and integration with the surrounding planting before a single tread is set. The easiest way to do that is to see a render of your actual slope with different stair options applied. Steps rarely stand alone: the flight has to land on something, so pair this with garden path and walkway ideas and, on a steeper site, hillside landscaping ideas.
Hadaa can generate photorealistic images of your garden stairs from a photo of your backyard. Upload your slope, specify the style you want — stone, timber, gabion — and see what each option looks like in your specific space before committing to a material and contractor.
This is particularly valuable for wide statement stairs or curved designs where the relationship to the surrounding planting makes or breaks the result. A render takes minutes; a rebuild takes months.
Verdict
Visualise stone vs timber vs gabion steps in your actual backyard before choosing a material. A ten-minute render prevents a ten-thousand-pound mistake.
Design your garden stairs →Frequently Asked Questions
What is the correct riser-to-tread ratio for garden stairs?
What materials are best for garden steps?
How wide should garden stairs be?
Do garden stairs need handrails?
How do I prevent garden steps from becoming slippery?
What is the best foundation for garden stairs?
Can I add steps to an existing slope without major excavation?
How much do garden stairs cost?
Garden Stair Design
See stone, timber, and gabion stairs in your actual backyard before you choose.
Upload a photo of your slope and get photorealistic renders of different stair materials and styles — so you can make the right material decision before a contractor starts digging.


